Hardware - Panel Prototype
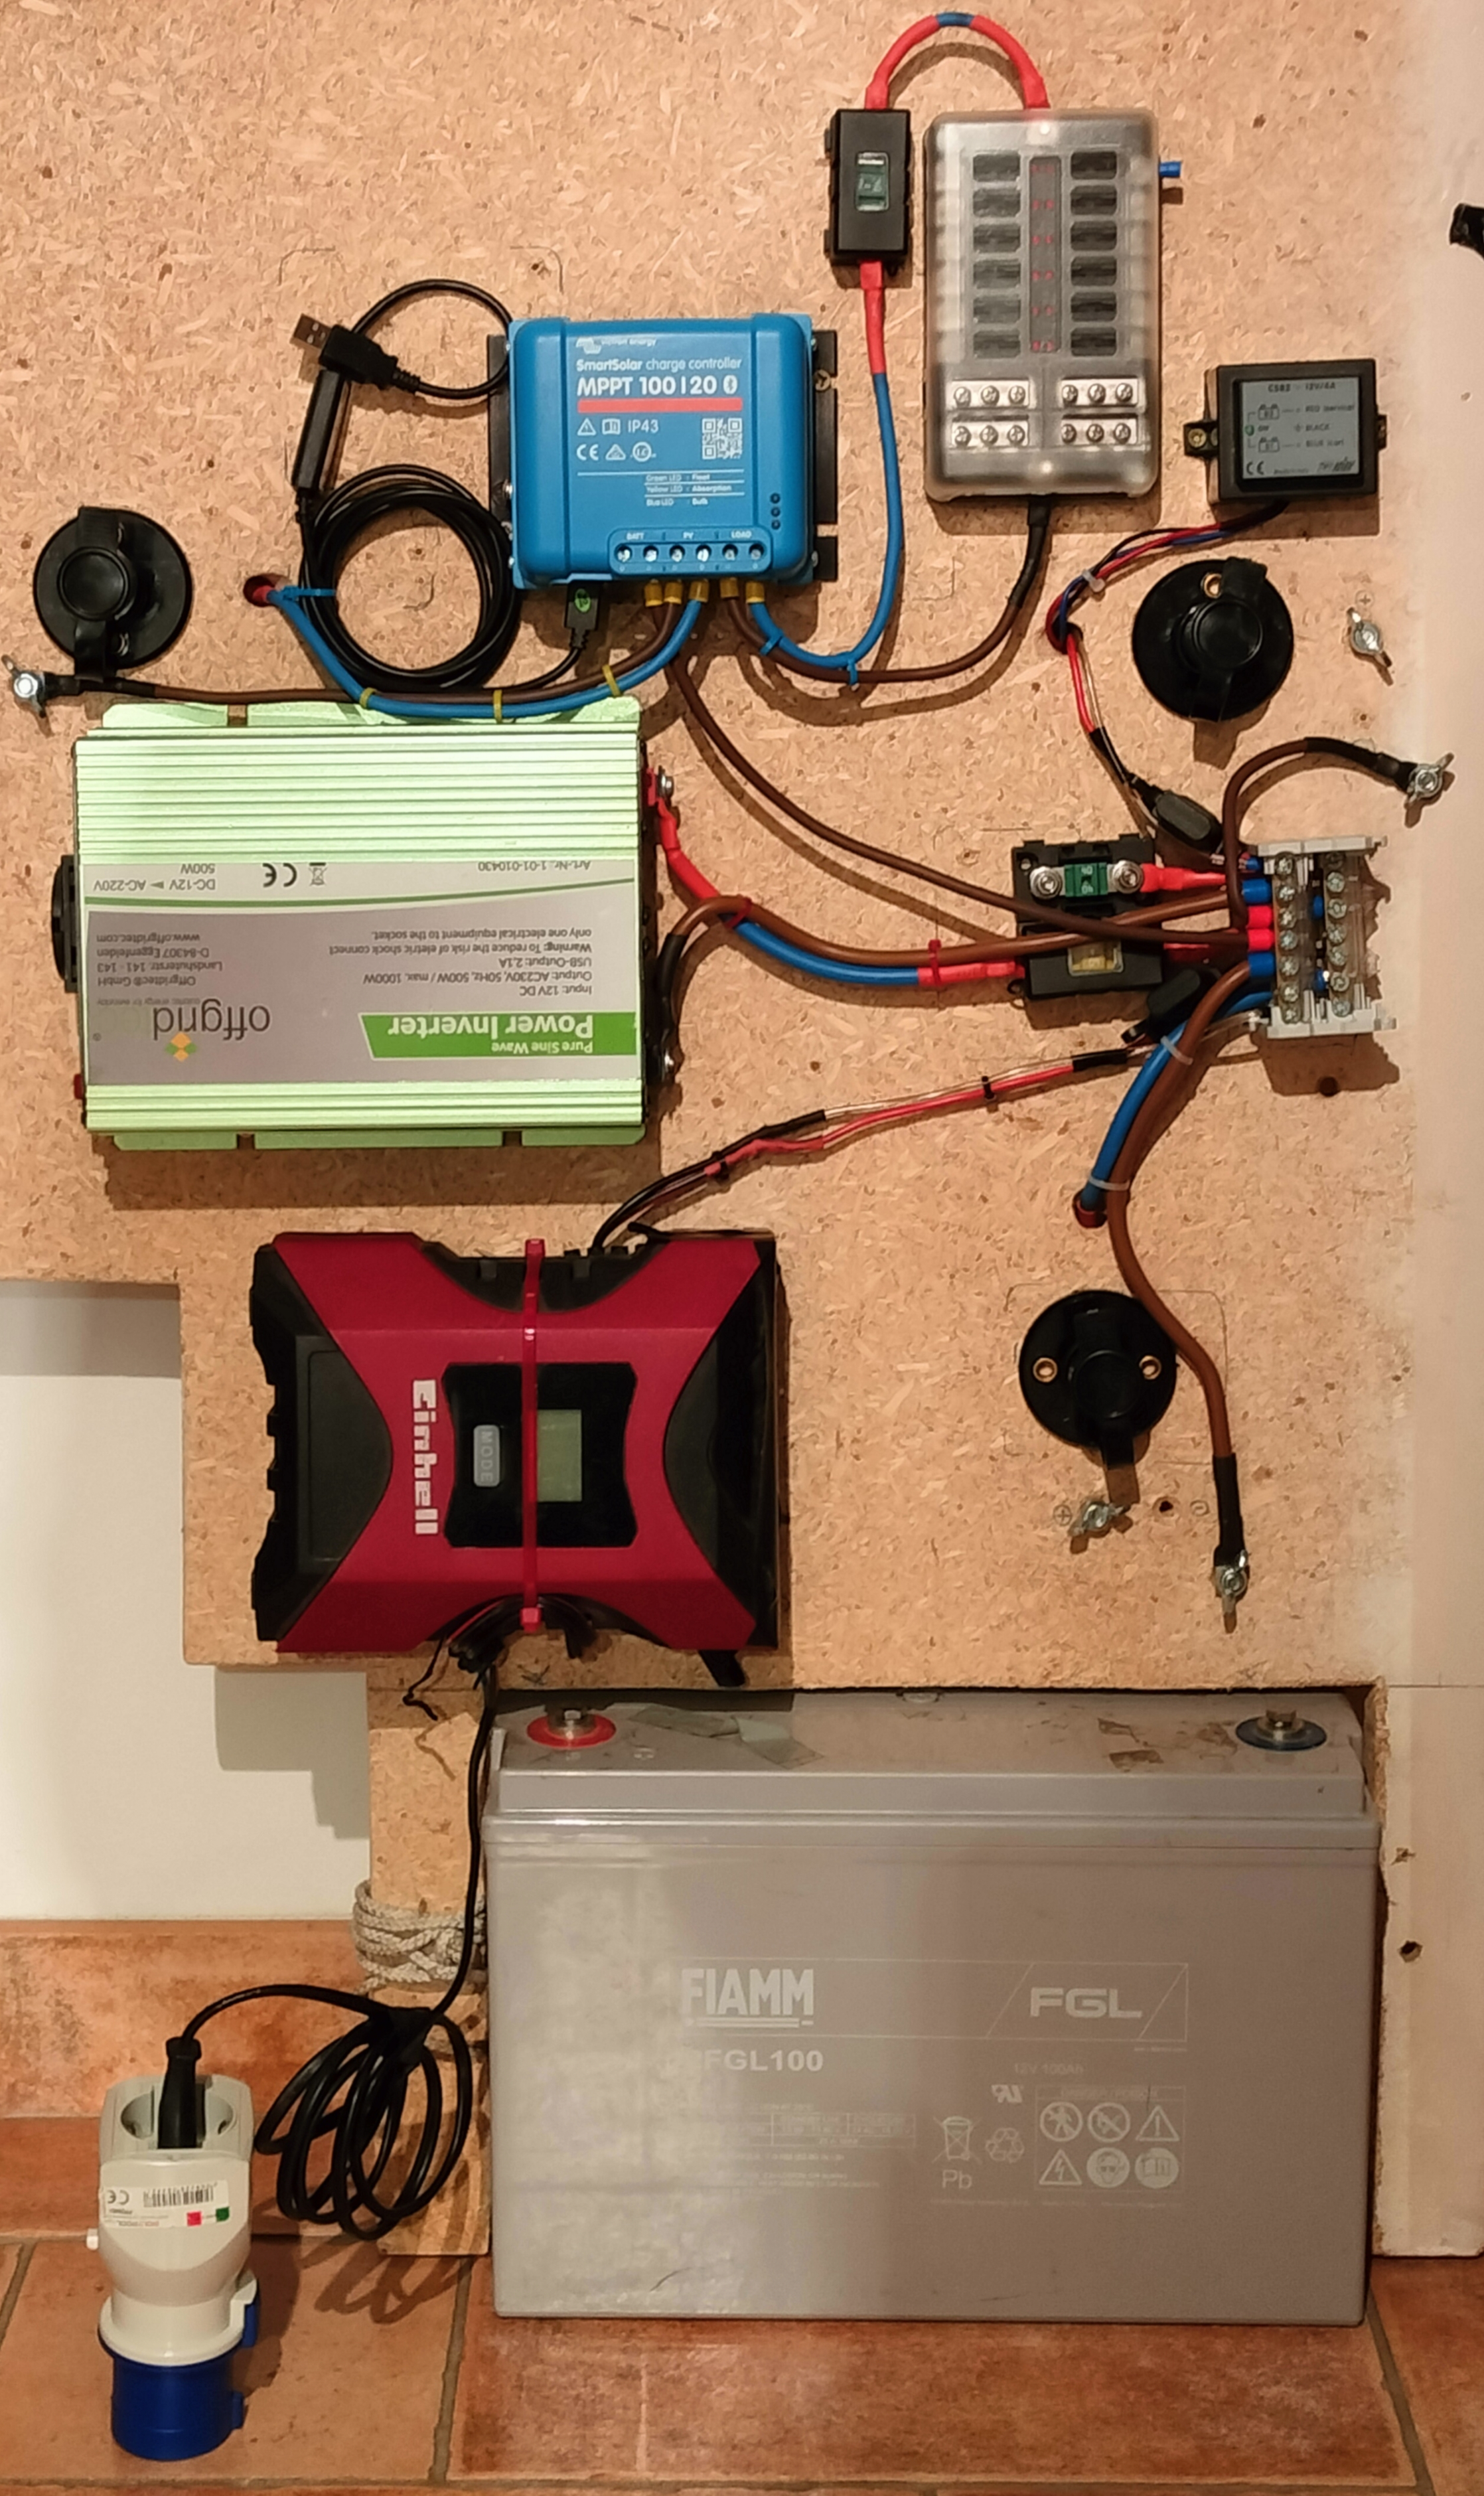
This is the first prototype of the Smart Van project, used for the development of the JOD Smart Van. This panel is designed to provide convenient access to integrated devices, facilitating development and testing. However, this prototype can be easily adapted to another form and used as a control unit for your camper.
Currently, this panel includes all devices for electrical management with
charging from solar panels and a 200V power column. It provides mobile internet
connectivity through the 4G module, environmental monitoring with sensors, and
the ability to connect 8 camper services with as many physical buttons.
Furthermore, this prototype is equipped with a GNSS module and a buffer battery
for IoT components. This way, your van will stay connected even when the vehicle
batteries are completely discharged or not plugged.
Build your Smart Van Box
Explore the documentation of this prototype to get an idea of how to adapt it to your needs. We recommend looking at the list of required materials and case 3D models to understand which devices need to be included in this prototype and where you can position them.
Prepare all the necessary materials
Check the [Hardware Requirements](/docs/hardware/panel_prototype/resources#hardware-requirements) and ensure you have everything needed to start. Note that many devices can be replaced with equivalent ones. More information can be found in the [Software/Firmwares](/docs/software#other-sources-and-repositories) pages related to the devices to be replaced.Assemble the Smart Van Box's blocks and connect them
Build each block following the [assembly guides](/docs/hardware/panel_prototype/guides#assembly). After that, position them on the panel and connect them together. If you prefer, you are free to change the arrangement and adapt it to the shape of your van.Load the JOD Smart Van image and power everything on
Flash the [JOD Smart Van](/docs/software/jod_smart_van/jod_smart_van) image onto the SD card to be inserted into the IoT block's Raspberry Pi. After that, insert it into the Raspberry Pi and power it on.
Panel's blocks
The devices in this prototype are streamlined into three distinct blocks for ease of understanding: Power, Integration, and IoT.
The IoT block serves as the brain and, leveraging its Raspberry Pi, can seamlessly expose the capabilities of the Smart Van Box to the SV Mobile App. Additionally, this block houses a variety of environmental sensors and GPS and GNSS modules.
In the remaining two blocks, you'll find the Power electronics, featuring a solar charger, inverter, fuses, etc., alongside the Integration section for camper services, encompassing relays, dimmers, and buttons.
Power Block
The Power Block houses all devices for managing electrical energy, including the Solar Charger, inverter, as well as fuses and switches for system and user protection. Check out the BOM for a full list of the devices.
Integration Block
Within the Integration block, you'll find the actuators and their respective fuses to control various camper services, moreover, the block houses some physical buttons.
Remember to connect the services according to their power requirements. Each 12V output of the Integration Box has a maximum capacity, so ensure that the connected service requires lower power.
IoT Box
The IoT block serves as the brain of the Smart Van Box. It's an IoT device based on Raspberry Pi that, with JOD Smart Van, enables monitoring and controlling all devices connected to the Raspberry Pi and, consequently, the Smart Van Box.
Within this block, various sensors are integrated, such as environmental sensors, gas detection sensors, but also GPS and GSM modules. Additionally, the block houses a buffer battery (UPS) that provides power to the IoT component even when the service battery is disconnected or depleted.
The IoT block use a ribbon cable to connect the Raspberry Pi to all devices with a 40-PIN header like the Sense Hat, the SIM7600 and also a small custom PCB board. This custom board houses the ports to connect the other devices in the IoT block to the ribbon cable and thus to the Raspberry Pi.